How to Design Eye-Catching Service Section Hover Effects Using HTML, and CSS
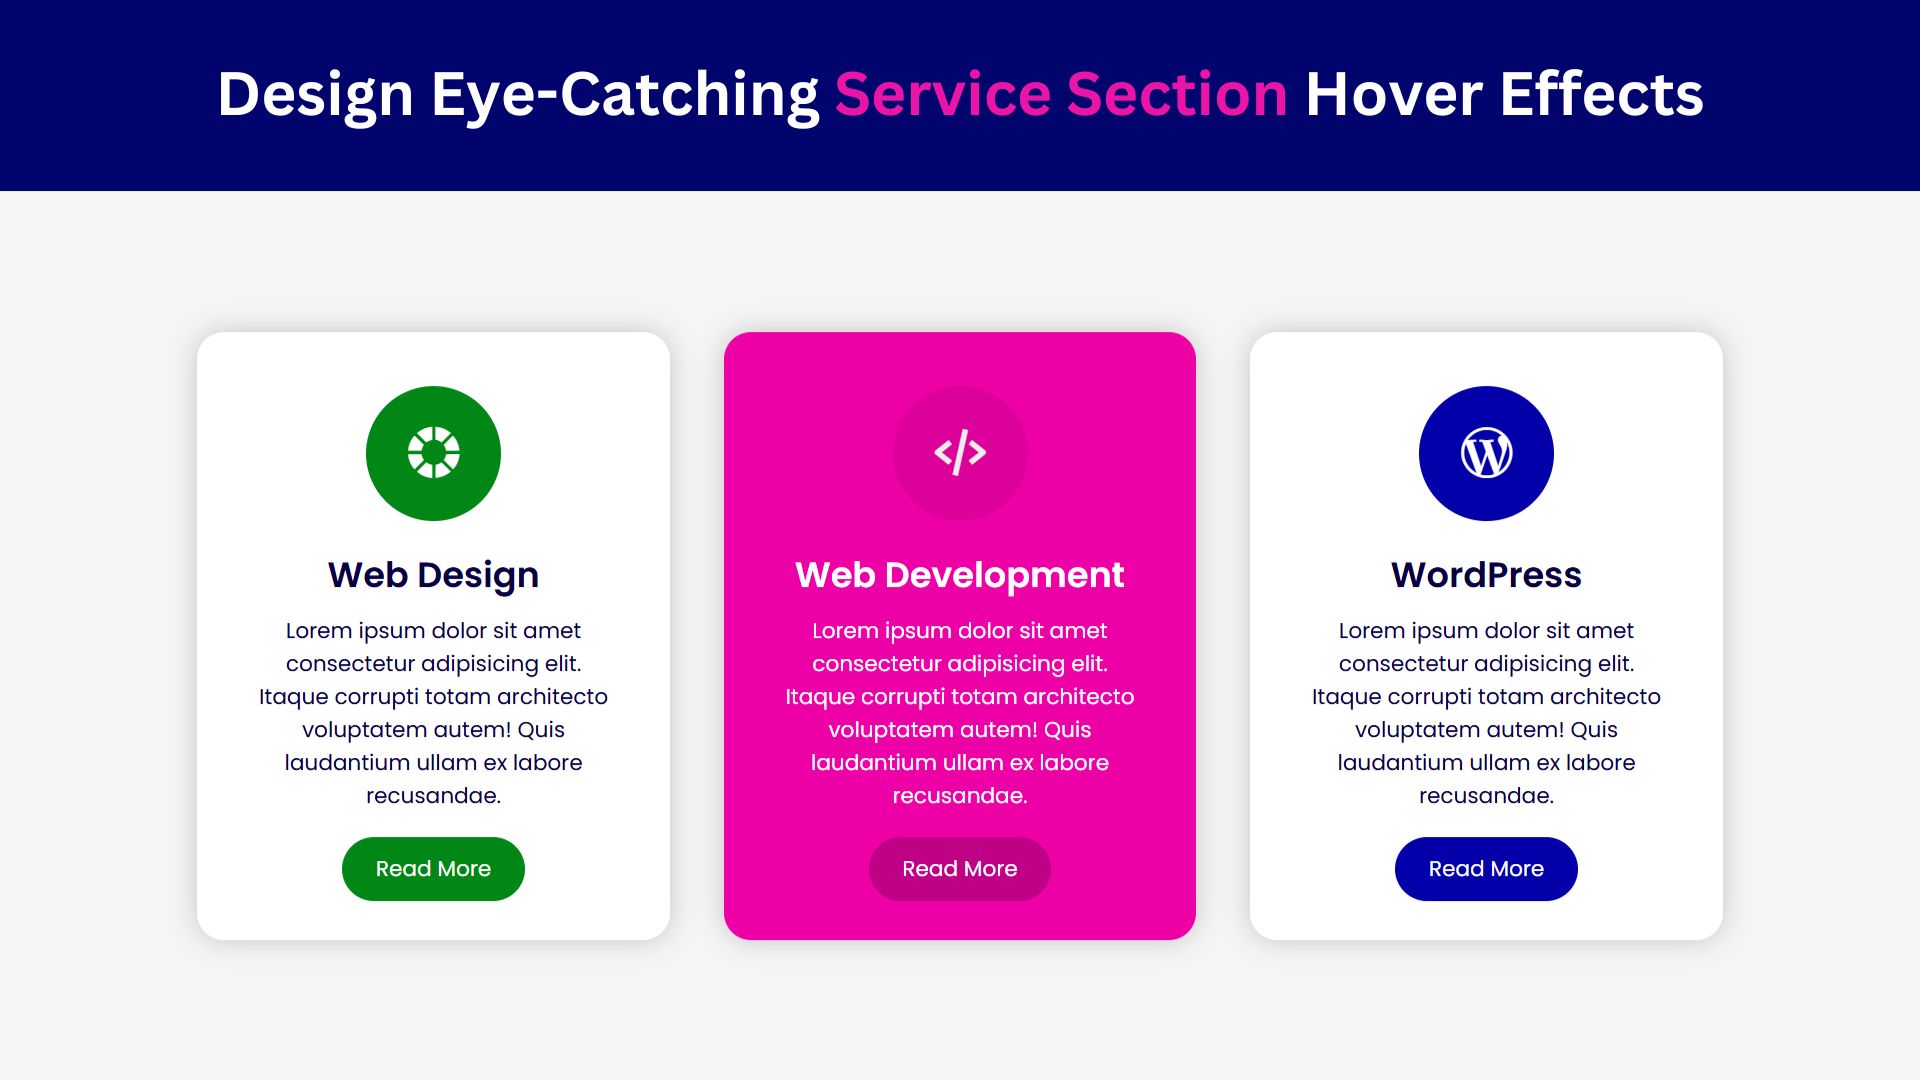
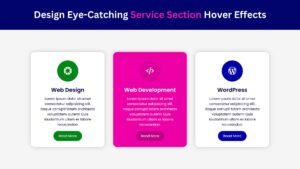
Hover interactions offer an engaging way to captivate users as they navigate your website. In the context of a service section, these effects can emphasize different services, making them more attractive and noticeable. Subtle animations activated on hover can effectively guide user attention and provide interactive feedback, enhancing the overall user experience. By implementing thoughtful hover effects, you can make each service item more dynamic and appealing, ultimately elevating the design and functionality of your service section. Let’s explore the techniques for creating these stunning hover effects using HTML and CSS.
What Are Hover Effects?
ver a specific element. These effects enhance the user experience by providing visual feedback, making a website feel more interactive and lively. In a service section, hover effects can help highlight different services, encouraging users to engage more deeply with each service offering.Hover effects are animations or visual changes triggered when a user hovers their cursor o
Check Out Those Useful Articles
Steps to Design a Service Section Hover Effects
To Design a Service Section Hover Effects follow these steps:
- Create a Folder: Name this folder according to your preference. Inside this folder, you’ll need to set up the following files:
- Create an index.html File: This file should be named index with the .html extension.
- Create a style.css File: This file should be named style with the .css extension.
These files will form the basis of your Service Section.
Setting Up the Basic HTML Structure
Now, open your code editor and set up a new HTML file, copy those HTML Codes and Paste those Codes on index.html file.
					<!DOCTYPE html>
<html lang="en">
<head>
    <meta charset="UTF-8">
    <meta name="viewport" content="width=device-width, initial-scale=1.0">
    <title>Service Section Hover Effect by AbdulDev</title>
    <!-- Custom CSS Link -->
     <link rel="stylesheet" href="style.css">
     <!-- Icon Box Link -->
     <link href='https://unpkg.com/boxicons@2.1.4/css/boxicons.min.css' rel='stylesheet'>
</head>
<body>
    <div class="container">
        <div class="box">
            <div class="icon"><i class='bx bxs-color'></i></div>
            <div class="content">
                <h3>Web Design</h3>
                <p>Lorem ipsum dolor sit amet consectetur adipisicing elit. Itaque corrupti totam architecto voluptatem autem! Quis laudantium ullam ex labore recusandae.</p>
                <a href="#">Read More</a>
            </div>
        </div>

        <div class="box">
            <div class="icon"><i class='bx bx-code-alt'></i></div>
            <div class="content">
                <h3>Web Development</h3>
                <p>Lorem ipsum dolor sit amet consectetur adipisicing elit. Itaque corrupti totam architecto voluptatem autem! Quis laudantium ullam ex labore recusandae.</p>
                <a href="#">Read More</a>
            </div>
        </div>

        <div class="box">
            <div class="icon"><i class='bx bxl-wordpress' ></i></div>
            <div class="content">
                <h3>WordPress</h3>
                <p>Lorem ipsum dolor sit amet consectetur adipisicing elit. Itaque corrupti totam architecto voluptatem autem! Quis laudantium ullam ex labore recusandae.</p>
                <a href="#">Read More</a>
            </div>
        </div>
    </div>
</body>
</html>
Styling the Service Section with CSS
After that, copy those CSS Codes and Paste those Codes on style.css file.
					@import url('https://fonts.googleapis.com/css2?family=Poppins:wght@100;400;500;600;700&display=swap');

*{
    margin: 0;
    padding: 0;
    box-sizing: border-box;
    font-family: "Poppins", serif;
}
body{
    min-height: 100vh;
    background: #f5f5f5;
    display: flex;
    align-items: center;
    justify-content: center;
}
.container{
    display: flex;
    align-items: center;
    justify-content: center;
    flex-wrap: wrap;
    gap: 40px;
}
.container .box{
    position: relative;
    width: 350px;
    padding: 40px;
    background: #fff;
    box-shadow: 0 0 20px #00000030;
    border-radius: 20px;
    text-align: center;
    box-sizing: border-box;
    overflow: hidden;
    cursor: pointer;
}
.container .box .icon{
    position: relative;
    width: 100px;
    height: 100px;
    display: flex;
    align-items: center;
    justify-content: center;
    margin: 0 auto;
    background-color: #000;
    color: #fff;
    border-radius: 50%;
    font-size: 45px;
    font-weight: 600;
    transition: 0.8s;
    overflow: hidden;
}
.container .box .icon::before{
    content: '';
    position: absolute;
    top: 0;
    left: 0;
    width: 100%;
    height: 100%;
    background: #00000033;
    opacity: 0;
    transition: 0.8s;
}
.container .box:hover .icon::before{
    opacity: 1;
}
.container .box .icon{
    position: relative;
    z-index: 1000;
}
.container .box:nth-child(1) .icon{
    box-shadow: 0 0 0 0 #018715;
    background: #018715;
}
.container .box:nth-child(1):hover .icon{
    box-shadow: 0 0 0 400px #018715;
}
.container .box:nth-child(2) .icon{
    box-shadow: 0 0 0 0 #ed01a6;
    background: #ed01a6;
}
.container .box:nth-child(2):hover .icon{
    box-shadow: 0 0 0 400px #ed01a6;
}
.container .box:nth-child(3) .icon{
    box-shadow: 0 0 0 0 #0300aa;
    background: #0300aa;
}
.container .box:nth-child(3):hover .icon{
    box-shadow: 0 0 0 400px #0300aa;
}
.container .box .content{
    position: relative;
    z-index: 10000;
    color: #08003f;
    transition: 0.5s;
}
.container .box:hover .content{
    color: #fff;
}
.container .box .content h3{
    font-size: 26px;
    margin-top: 20px;
    font-weight: 600;
}
.container .box .content p{
    margin: 10px 0 30px 0;
}
.container .box:nth-child(1) .content a{
    text-decoration: none;
    background: #018715;
    padding: 12px 25px;
    border-radius: 45px;
    color: #fff;
    transition: 0.8s;
}
.container .box:nth-child(1):hover .content a{
    background: #00000033;
}
.container .box:nth-child(2) .content a{
    text-decoration: none;
    background: #ed01a6;
    padding: 12px 25px;
    border-radius: 45px;
    color: #fff;
    transition: 0.8s;
}
.container .box:nth-child(2):hover .content a{
    background: #00000033;
}
.container .box:nth-child(3) .content a{
    text-decoration: none;
    background: #0300aa;
    padding: 12px 25px;
    border-radius: 45px;
    color: #fff;
    transition: 0.8s;
}
.container .box:nth-child(3):hover .content a{
    background: #00000033;
}
@media screen and (max-width: 900px) {
    .container{
        padding: 60px 0;
    }
}
Testing and Fine-Tuning Hover Effects
To ensure that your hover effects work flawlessly across various browsers and devices, thorough testing is essential. Begin by checking the hover interactions on popular browsers such as Chrome, Firefox, Safari, and Edge. Each browser may render CSS animations differently, so it’s important to identify and address any inconsistencies.
Utilize tools like BrowserStack or CrossBrowserTesting to simulate how your service section appears on different operating systems and devices, including tablets and smartphones. This helps in identifying any issues related to responsiveness and ensuring that your hover effects are smooth and functional across all platforms.
In addition to cross-browser testing, optimize your CSS code to improve performance. Avoid using too many complex animations simultaneously, as they can cause lag and slow down page loading times. Minimize the use of heavy CSS properties like `box-shadow` and `filter`, which can be computationally expensive.
Another important aspect is accessibility. Ensure that hover effects do not interfere with the readability or usability of the service section. Users relying on keyboard navigation or screen readers should still be able to access all the information without difficulty. Consider adding focus states and aria attributes to make your hover interactions inclusive.
Monitor the performance of your hover effects using browser developer tools. These tools provide insights into the rendering performance and can help you pinpoint areas that may require optimization. Pay attention to metrics such as paint times and script execution times to ensure your animations are not causing performance bottlenecks.
Lastly, gather user feedback to understand how real-world users interact with your service section. This feedback can provide valuable insights and help you make necessary adjustments for a more polished and engaging user experience.
Summary and Recommended Practices
Mastering hover effects can greatly enhance your service section’s visual appeal and user interaction. Begin with a robust HTML and CSS foundation and progressively add more complex effects. Prioritize simplicity and ensure your CSS is optimized for performance to avoid slow page loading times. Test across various browsers and devices to maintain consistent behavior and responsiveness. Accessibility is crucial; ensure your hover effects don’t hinder readability or navigation for users relying on assistive technologies. Use focus states and aria attributes to make interactions inclusive. Gather user feedback for real-world insights and adjust as needed. For continuous learning, refer to resources like CSS Tricks and MDN Web Docs for advanced techniques and best practices.
FAQs
What is a hover effect in web design?
A hover effect is a CSS technique used to create a visual change when a user hovers their cursor over a web element, such as a button or service item. It helps make a website more interactive and can draw attention to important sections.
Why should I add hover effects to my service section?
Adding hover effects to your service section enhances user experience by making it more engaging. It can also highlight each service, encouraging visitors to explore your offerings and interact with your content.
Do I need JavaScript to create hover effects?
No, basic hover effects can be achieved using only CSS. You can add animations, color changes, and transformations without needing JavaScript, making it easier and faster to implement.
What CSS properties are commonly used for hover effects?
Common CSS properties for hover effects include transform, opacity, background-color, box-shadow, and transition. These properties allow you to create scaling, color changes, shadow effects, and smooth transitions on hover.
How do I make the hover effect smooth and not abrupt?
To make hover effects smooth, use the transition property in CSS. For example, transition: all 0.3s ease; will create a smooth transition over 0.3 seconds when the hover effect is applied or removed.
Can I apply multiple hover effects to one element?
Yes, you can apply multiple hover effects to a single element by combining CSS properties. For example, you can scale an element while also changing its color and shadow effect on hover.
How do I add an overlay color on hover?
You can add an overlay color on hover by using a ::before pseudo-element with a background-color and setting it to opacity: 0. Then, change the opacity to 1 on hover to display the overlay effect.
Are hover effects responsive for mobile devices?
Hover effects work well on desktops, but on mobile devices, they may not be as effective since there is no cursor. You can add :active or :focus states for similar effects on mobile, or limit hover effects in your CSS for smaller screens.
Can I customize hover effects for each service item?
Yes, you can customize hover effects for each service item by adding unique classes or IDs to each element and applying different styles. This allows for tailored animations or color schemes per item.
Will hover effects slow down my website?
CSS hover effects have minimal impact on performance if kept simple. However, complex animations or excessive effects could slow down the site. It’s best to use subtle effects and optimize CSS to maintain good performance.
Share on Social Media
Related Articles
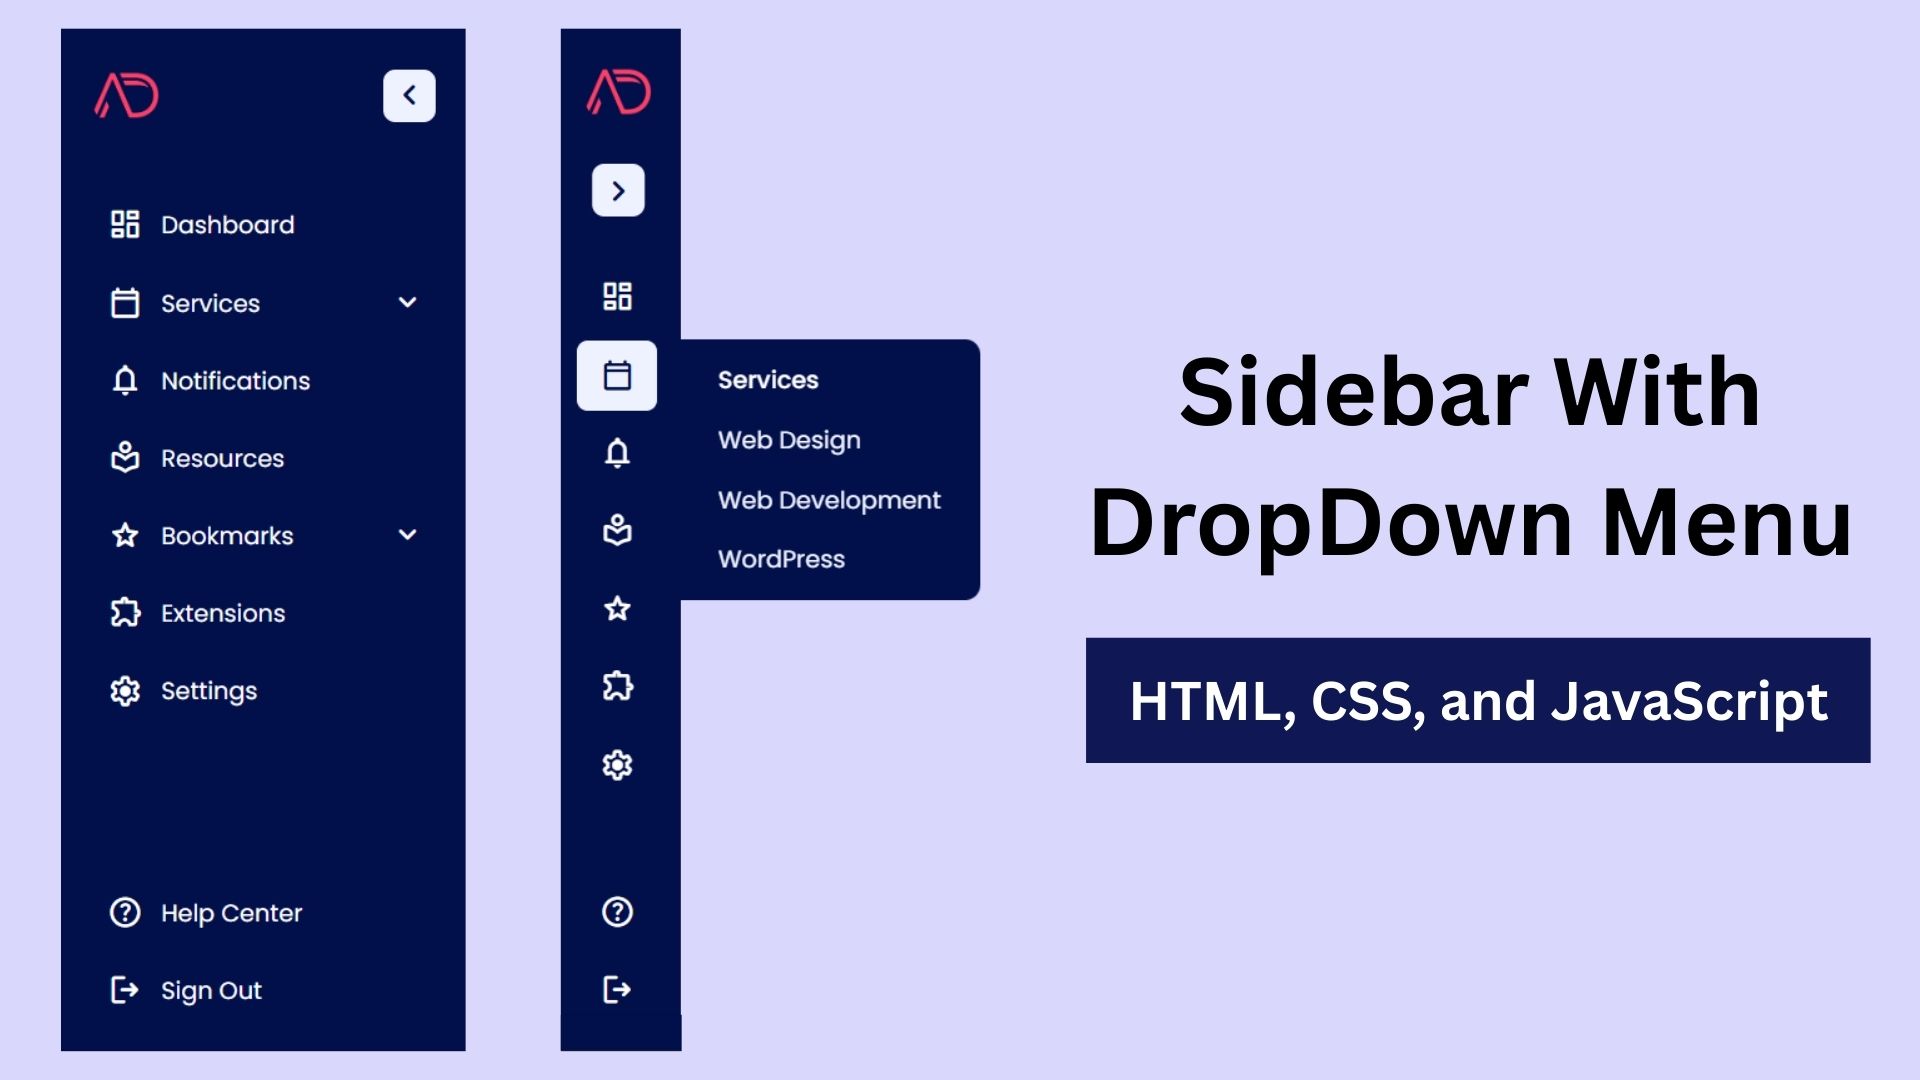
Build a Fully Responsive Sidebar with Dropdown Menu – HTML, CSS & JS
Learn how to build a fully responsive sidebar with dropdown menus using HTML, CSS, and JavaScript. Step-by-step guide with code
Responsive Sidebar Menu in HTML, CSS & JS | Light/Dark Mode
Learn how to create a modern responsive sidebar menu with a light and dark theme switcher using HTML, CSS, and
Amazing Button Hover Effect Using HTML, CSS, and JavaScript
Discover how to create amazing button hover effects using HTML, CSS, and JavaScript. Learn step-by-step with free source code to

